


My friend, Christine Harrison in Australia, has requested a Photoshop Elements tutorial on our free Christmas bulb template. Here is an image link to the bulb template freebie.

═.♥.═══════════════════════════════════

To begin this tutorial I hopped over to Wikimedia Commons and snagged a beautiful picture of a little girl painted by Gustave Doyen in 1837. I love these old images! Of course you can use your own family pictures.
═.♥.═══════════════════════════════════
In the freebie zip file I chose to open the file "Christmas Ornament for PSE GE" in Photoshop Elements 10.

═.♥.═══════════════════════════════════
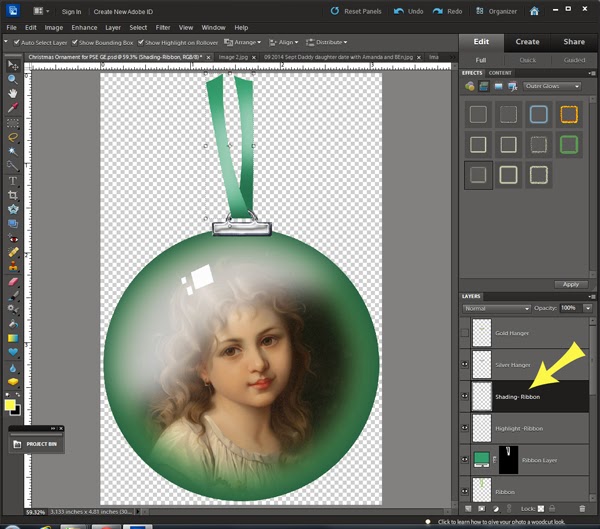
Once I had it open I could double click on the color fill layers in the lower right hand corner. This allowed me to choose new colors for my ornament. Also note that on this template you can chose a silver metal hanger or unhide the gold metal hanger. It's a matter of clicking on the little eyeball to the left of the small layer icon.

═.♥.═══════════════════════════════════
Once I'd chosen the colors I liked I opened my little girl picture and dragged and dropped it into the template. The placement of where you drop it in the template is important. Once it is in your template you can drag the picture layer on the right hand side to put it in the order you like. In this template it should be under the "bulb frame layer" (color fill layer) and the Bulb frame.

═.♥.═══════════════════════════════════
Once the image was where I wanted it I selected the "bulb" layer at the bottom of the template. It is the exact shape we need our picture to be. 1) To select it I hovered my mouse over the layer icon and pressed ctrl click. Now you should see an outline in the shape of a circle that looks like it is in motion. 2) It is important for the next step that you make sure you have the photo image selection selected.

═.♥.═══════════════════════════════════
Now that I look at my image below I wish I would have split it into two images for you. It is actually two images on one background. The first image shows that once you have the bulb selected from the previous step you choose the drop down menu from the "select" option at the top of your screen. In the drop down section you choose "inverse." Now the area out side of the bulb is selected.
Making sure that on the far lower right you are still on the photo layer choose "edit" at the top of your screen and then choose "cut."

═.♥.═══════════════════════════════════
You're almost done. In the right hand side of your screen where you see your layers, right click on any layer and choose "merge visible" when the drop down menu appears. From here you can drag/drop the image onto another paper you have open. You can also choose "File" at the top of the screen and "Save As..." to save it as a PNG file to use later. Saving it as a PNG file will retain your transparent background.
═.♥.═══════════════════════════════════
I hope this tutorial is helpful for you. There is a normal template file in the zip also, along with separate png files for each layer. What makes the "Christmas Ornament for PSE GE" special is it still has the color fill layers I used to make it... so it is that much easier to change the colors.
No comments:
Post a Comment